
I decided that it would be really handy to have a larger truck around. The problem is that once you get either air-brakes, or a gross vehicle weight rating (GVWR) of over 26,000 pounds, you need a commercial drivers license (CDL). Thats the reason you see so many 26,000 GVW single-rear-axle trucks with air-over-hydraulic brakes they are right at the maximum with no CDL required.
My timing was bad starting at the beginning of 2009, it became necessary for new truck-drivers to have formal training prior to testing for their CDL. For a class-A license, which you need to have for a full size truck pulling a trailer, the formal training requirement is 160 hours. Now, many retired folks might choose a four-week vacation somewhere, but I thought this would be an equally interesting, and way more useful way to spend a month, so I signed up at North Cross Commercial Driving School, about twenty miles north of where I live. North Cross Commercial Driving School
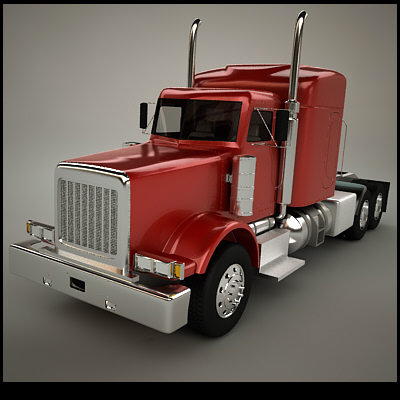
If driving a truck has ever crossed your mind, or you just like the looks of that Kenworth, Freightliner, or Peterbilt going by, maybe you would enjoy reading a little more about the trucks and driver training experience, so here goes
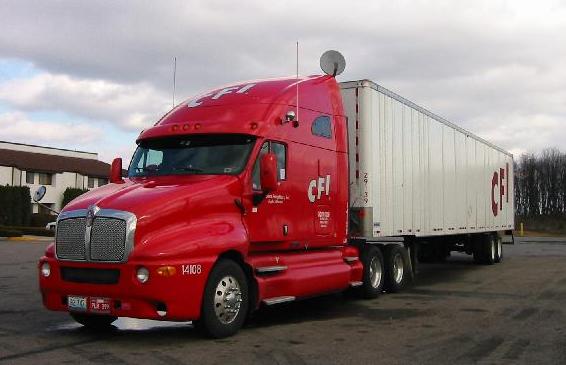
The typical semi-truck configuration has a tractor with a single steer axle in the front, combined with two drive axles in the rear, and a fifth wheel that is used to connect to the trailer. Under the hood, you will typically find a Caterpillar or Cummins turbo-charged diesel motor, usually having six big cylinders. These motors range from about three-hundred to six-hundred horsepower in typical configurations. The RPMs are generally kept in the 1000 to 2200 range, where the motors generate in the range of 1000 ft-lbs of torque. Fuel mileage for these rigs is typically about six MPG.
Behind the engine is normally a manual transmission, but with some of the newer trucks, automatics are becoming more common. The automatics are really manual transmissions that are shifted for the driver via solenoids and computer control. The most common manual transmission for many years has been the Eaton-Fuller Road Ranger. This comes in several configurations. The most basic is a nine or ten speed. This transmission has two ranges, so you go through the gears in low range, and then, with a switch on the front of the gear knob, you change to high range, and go through the gear sequence again. The next step up is the 13-speed. This has a splitter so that you can also have a high and low speed in each gear. The 13-speed allows the splitter to be used on the gears while in high range. An 18-speed is the same, but allows the splitter to be used in all gears - high and low range. The splitter is controlled by a second switch on the side of the shift knob. Its typically red for a 13-speed, and gray for an 18-speed, and of course not there at all with a nine or ten speed which only has the range switch. These transmissions have NO synchromesh.
This shows the top of an 18-speed knob, the gray lever on the left is the "splitter" control (changes between H and L on each position).
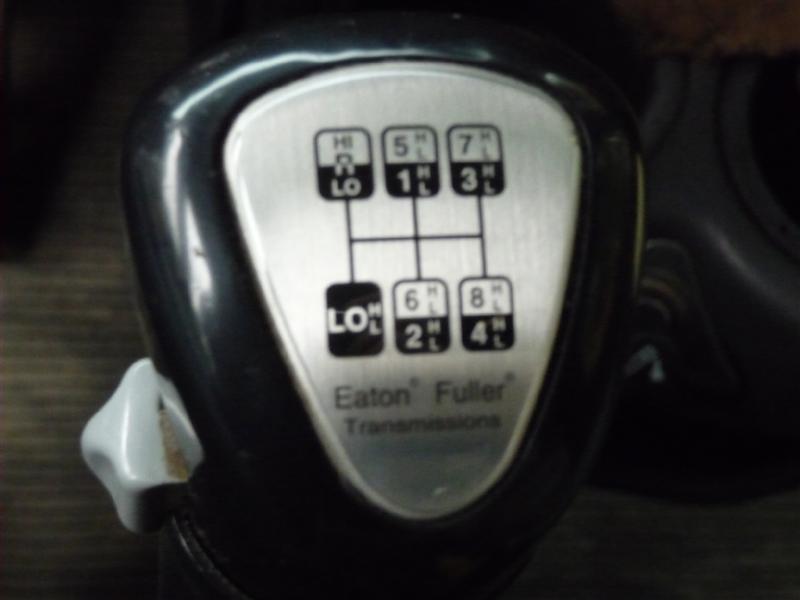
In this view, you can see the high/low range switch on the front of the shifter (changes between black and silver-colored gears on knob above)...

The clutch is different than on a car. Since there is no synchromesh, you are double-clutching every shift both up and down. Some old-time drivers dont use the clutch except when first taking off, but most mechanics (and the manufacturers of the transmissions) agree that this is tougher on transmissions and dont recommend using this practice. The clutch disengages just a couple inches from the top of the pedal travel, so that is all the movement that is necessary for the many-many clutch presses that you routinely do. In fact, thats ALL the travel you want to routinely use. If you press the pedal all the way down, it engages a brake on the input shaft of the transmission. This brake is necessary when you are stopped and want to put it into gear. The gears are so heavy, and with no synchromesh to help, without the brake you would be waiting a very long time to shift into gear when stopped. If you push all the way to the floor while normally shifting, you wear out that brake.
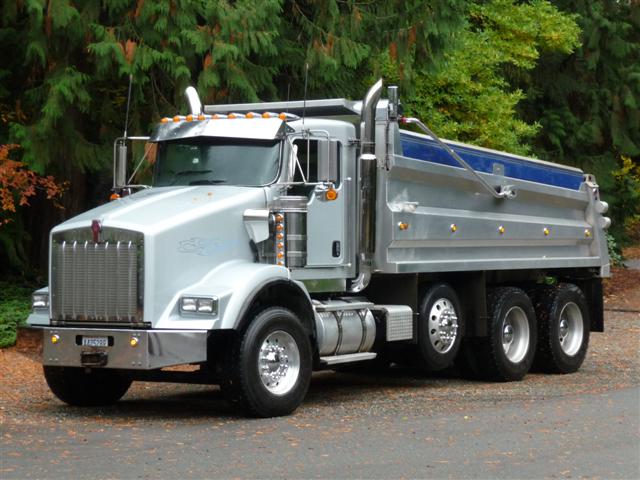
The rear axles arent unlike normal car axles, only much heavier duty. There is a lock mechanism that you control from in the cab that will connect both rear axles together so that they are both driving, otherwise just the front axle is driving. Some trucks go further and also allow you to lock both wheels on the same axle together. Some trucks have drop or tag axles that are moved into contact with the road while carrying maximum sized loads. This increases the carrying capacity of the truck.
The brakes on the typical semi are huge drum brakes. Were talking five, six inches wide, and with almost half an inch of lining. They have a slot, so that from under the truck you can look and see how much lining you have without taking off the drums. Some truckers remove the entire backing plate so you can quickly check the brakes. The brakes are controlled by air. A compressor in the truck keeps tanks filled with 100-125 PSI of air. This pressure is applied to the brakes via valves operated by the brake pedal to make the brakes actuate. Trucks also have spring brakes that cause the brakes to come on when parked or if you ever lose air pressure (e.g., the trailer becomes separated from the tractor or an air line breaks). When you release the park brakes, air is applied to a cylinder to override very strong springs (about 3000 lbs) that keep the brakes locked without this pressure applied. The loud Shhhhhhh that you hear when trucks park is the pressure being released from these chambers.
Now a little about trailers: The fifth wheel is a big disk on the back of the truck:

It mates with a similar disk on the trailer, and thats where the connection is made. In the middle of the disks is a kingpin on the trailer side, and latching jaws for the kingpin on the truck side. A latch arm is pulled to release the trailer while unhooking. Surprisingly, the latch arm can be released easily by vandals when you are parked, so after a stop (like for one of those fine truck-stop diet meals), its smart to check it rather than facing the prospect of driving off without the trailer. A slathering of grease on the fifth-wheel allows the truck to easily turn. The fifth-wheel on the tractor can usually be slid fore and aft to allow the weight to be balanced properly on the tractors axles.
Two air lines carry brake air pressure to the trailer. These are connected via glad hands to the trailer. Finally, an electrical line carries the lighting current to the trailer. When disconnecting, the landing gear is lowered via a big crank handle, and this holds the front of the trailer up. Trailers have a DOT Bar in the back that keeps cars and truck from submarining under the trailer if they rear-end the truck.
Both tractors and trailer have mandated anti-lock brake systems (ABS) for the last few years. Some older equipment doesnt, but trucks and trailers mix and match properly, even if one of them doesnt have ABS. Trailers with ABS have a special light on the drivers side that illuminates if the ABS isnt working properly. Look for that next time you see a trailer its a separate light that is located off-line with the normal running lights.
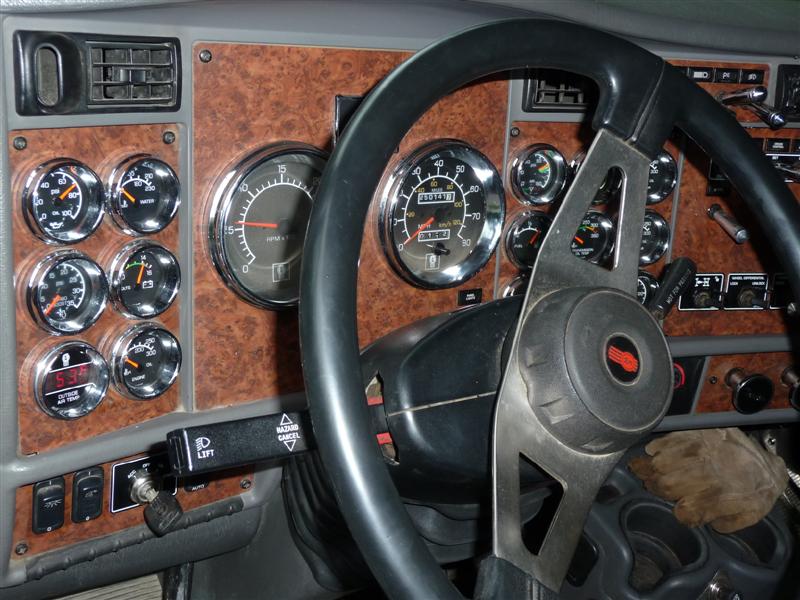
Whats with all the gauges and levers on the dash? Looks like an aircraft in there.
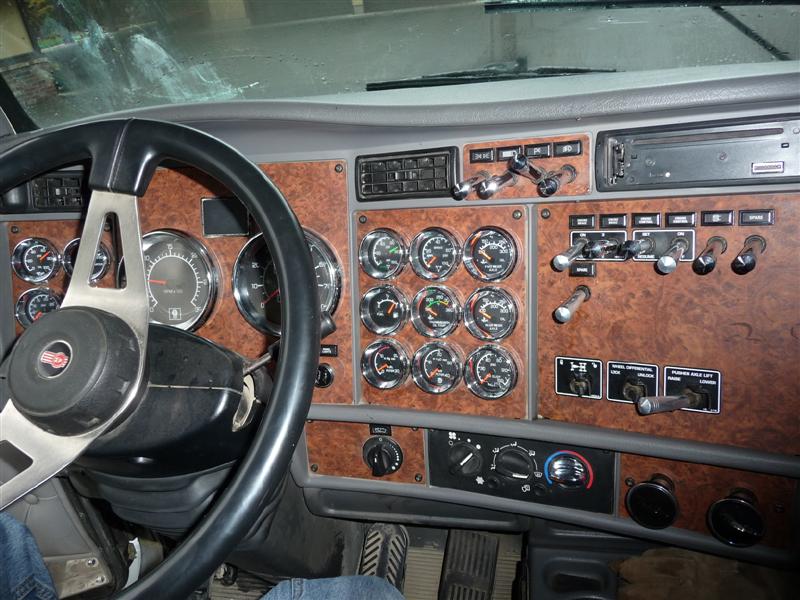
Here are some of the gauges you might find: available brake air pressure, usually a dual gauge one for each system; brake application pressure how much air pressure is appled to the brakes as you press the pedal; your typical fuel level, oil pressure, ammeter and water temp gauges; turbocharger boost PSI up to about 30 PSI is used; transmission, engine and differential oil temperatures; and gauges that show the drop in pressure across the fuel and air filters so you know when they need replacement.
Controls that you are likely to see include the two park brake air-controls (one for tractor, one for trailer); a hand-controlled trailer-only brake control called a Johnson Bar or trolley valve; turn signal switch (not automatically cancelling) with integrated four-way flasher switch, air controls for unlocking the fifth-wheel for adjustment and for locking the axles together; control for applying air to the air suspension bags; control to apply air to the drop/tag axle; mirror heat and adjustment switches, various light switches, including one to interrupt the running lights to thank drivers for letting you in; cruise control; CB of course, and engine retarders (typically called Jake Brakes because they were originally sold by Jacobson) that can be set to off, or different level of braking. If you are looking in a truck with hydraulics (like a dump truck), you will also find more controls for enabling and actuating these functions.
So, lets get in and go for a drive! Climb up a couple of steps over one of those twin 150-gallon diesel tanks and settle into a comfy air-ride seat. Adjust it just right up and down, lumbar, until you are comfy. Set the tilt of the steering wheel. Make sure youre in neutral, press down the clutch and fire up the motor just like you would your car. Watch the gauges to ensure that your oil pressure is up, and that the brake air pressure in both tanks is fully charged. Press in a large knob that turns off the park brake on the trailer. Then press in the large knob that turns off the park brake to the tractor. As you do, gently press the foot brake.
Now, press the clutch down all the way to the floor and wait for the clutch brake to do its thing so you can shift into first. Let's assume we are driving one of the simpler transmissions, the nine-speed Road Ranger. Make sure that the shifter is in low range. Soon you can slip the transmission into first without grinding. While leaving the engine idling, slowly release the clutch. When you feel the tractor start to torque, release the brake and you will roll off without first rolling backwards. Be careful to not give it any throttle when taking off you have way too much torque at your command and things like your driveshaft will break. Once youre up to about 1700 or 1800 RPM, push clutch down, shifter to neutral, clutch out, clutch in, shifter to next gear, clutch out again. Repeat until you are in fifth (about 15 MPH), then on that shift, also change to high range prior to the shift, then go the rest of the way up. Same thing going down through the gears, but give it throttle when in neutral and clutch out between shifts.
An interesting part of driving a semi is that the shifting drastically changes based on load and incline. For example, when heavily loaded and going up an incline, you can drastically slow down during the time the shift takes. Or going down heavily loaded, you will speed up more than for the next gear stay away from the shifter going down long grades you could end up out of gear and in big trouble.
Otherwise, driving down the freeway is smooth and comfortable. You need to stay in the right-most lane most of the time and observe a 60 MPH limit in most states. Plenty of mirrors give fairly good information about your surroundings. Other than using most of the lane width, the biggest difference from driving a car is that it takes a long, long time to stop. For example, 300 ft from 60 thats if its dry and youre moderately loaded. If its wet (and worst yet youre unloaded at the time), the distance goes way up.
On secondary roads and you're driving a car, its easy to complain about being held up behind a truck youre thinking theres five or more cars behind him he has to pull over, but the reality is that it takes a very long spot to pull off and get back on very difficult to find. Also, you cant trust most shoulders to hold your weight.
Around town, things are pretty stressful. Youre taking most of your lane to start with, and turns usually require part of somebody elses lane. This is called encroaching (which is OK). If you force somebody out of the way (not OK), its called barging. At railroad crossings, you have to be ready to stop as you enter, but if you do start crossing, you cant shift, cant stop (you have to make sure traffic isnt stopped on the far side so you get past the tracks), and you have to look out for the potential for bottoming or hitting things above. Most highways are designed to handle trucks up to 14 high. And most trucks are near that. But all bets are off in residential areas, parking lots, side roads, and even places where repaving has occurred and clearance has been diminished.
Need to back up? Dont do it unless you need to! You cant see much behind you. Many truck mirrors say GOAL on them get out and look. If you need to back up, get out and look, turn on your 4-way flashers, beep your horn, and then go back at an idle. Try to always turn towards the drivers side where visibility is much better.
Well, some of this probably sounded a little foreboding. But I have to say, as you sit up there with all that machinery moving under your control, looking down at the people in the regular world, you feel like you are a king! Its a great feeling.
So back to getting the CDL. First you study the state CDL guide and at the department of licensing (DOL) take the tests for the ratings that you want. Combination vehicle, tanker, bus, triples, hazardous materials, air-brakes, etc. The DOL will also set you up with a CDL learners permit that allows you to drive with an experienced CDL driver in the other seat. Along the way, you go to your doctor and get a DOT physical. At last, you are ready to go to school. At the school we had a combination of class time, lab time, driving time, and observation time. Weekly tests let us know how we were doing.
Interestingly enough, the biggest cause for test failures is the pre-trip inspection of the truck which you perform each day to know that the truck is safe and ready to go. So a significant amount of time is spent in school discussing and learning the proper way to do this inspection. Other time is spent practicing driving in various conditions town, freeway, backing etc, and trying to figure out how to smoothly shift. This is one of the toughest parts (for me anyway), and even the pros sometimes run into a bad shift. Time is spent talking about securing loads, installing chains, theory of air-brake systems, using log-books, load distribution, how to deal with weigh stations, and so on.
Finally, after logging the 160 hours (or more), its time to take the test. The testing person was a third-party contractor certified by, and hired by the state. I was as nervous as I was forty-five years ago when I took my original drivers license test. The test entails three parts:
Here you need to go through a very complete and detailed check of the truck for safety. It starts with the tests for the air brakes, which involves a number of steps, if you miss any of them, your test is over right away. Then during a walk-around of the vehicle, you check integrity of steering, suspension, wheels and tires, fluid-levels, frame, air and electrical lines, etc. Essentially, its necessary to memorize the state CDL procedure for this part of the test, and as I mentioned, its the part of the test causing most failures.
This part of the test demonstrates that you can handle your semi in a loading dock situation. The first part is to back the truck and trailer straight back into a 100 long alley that is 12 wide.The alley is created with cones, but you have to ensure that you dont hit any, and even that the mirrors dont go over top of the cones. At the rear of the alley, you need to stop with the back of the trailer in a 2 long area. Points are deducted of you hit any cones, or need to stop and go forward. And if you forget to check mirrors, beep your horn and turn on flashers before you start backing. I got dinged for forgetting the 4-way flashers. The next part of the test is to pull out of the alley at a 45 degree angle, and then negotiate the truck back into the aisle from this angle. It isnt necessary to go all the way back, the stop-cone zone is further forward during this part of the test.
On the road test, you are evaluated as you drive in city, freeway, and side-road conditions. Part of the test involves stopping the rig half-way up a hill, parking it within 12 of the curb, then entering traffic again as you take off up the hill safely and without rolling back. The tester is looking for driving errors such as not checking mirrors, driving over curbs (immediate disqualification), properly negotiating rail road tracks, proper shifting and braking, etc.
Once you pass these tests, you can be issued your CDL for the class truck you have driven and with the endorsements for which you have taken the written tests. Evidently, soon there will be a CDL differentiation for manual vs. automatic transmission. You will need a separate endorsement if you want to be certified for driving a manual transmission.
When I first found out that the CDL school was required, I thought that it was just another unnecessary state requirement. But after taking the training, I think it was extremely valuable, and a very good idea that its a requirement. Makes me safer, and also the other people on the road. When I think of all the people out there driving around with motor homes and large trailers, it makes me think that some sort of abbreviated training for those vehicles would be a good idea too. After all, we require special training for motorcycles, yet they seldom do damage to others - driving heavy-weight machines around has a lot of damage potential to others.
After I got my truck, even though it was for personal use, I discovered that I couldn't license it unless I applied for a USDOT number. This requires that you have a sign on the side of your truck with your (or your company) name, home town, and USDOT number. Driving around with your name in big letters on the door makes you a more polite driver. If everybody had to do that, we'd probably have a little less road-rage.
10-4 good buddy!