
The Model-A ignition has no advance/retard other than what you control manually from the steering wheel lever. In addition, the standard distributor needs to be oiled every 500 miles to keep the bushings in good shape, and of course requires routine contact point maintenance. So I bought an upgraded distributor that has automatic advance and electronic triggering, but still looks completely stock. Providing automatic advance is a nice thing to do to a motor since it isn't running full advance at low RPMs. However, unlike most later ignitions, this upgraded unit doesn't have vacuum advance to let the timing retard a little during heavy throttle settings.
Just as with the original, notice that instead of spark plug wires, there are brass strips that serve the purpose. You have to be a little careful where you put your hands when the engine is running, there's plenty of voltage going through those uninsulated strips. This is the new distributor - looks just like the original:
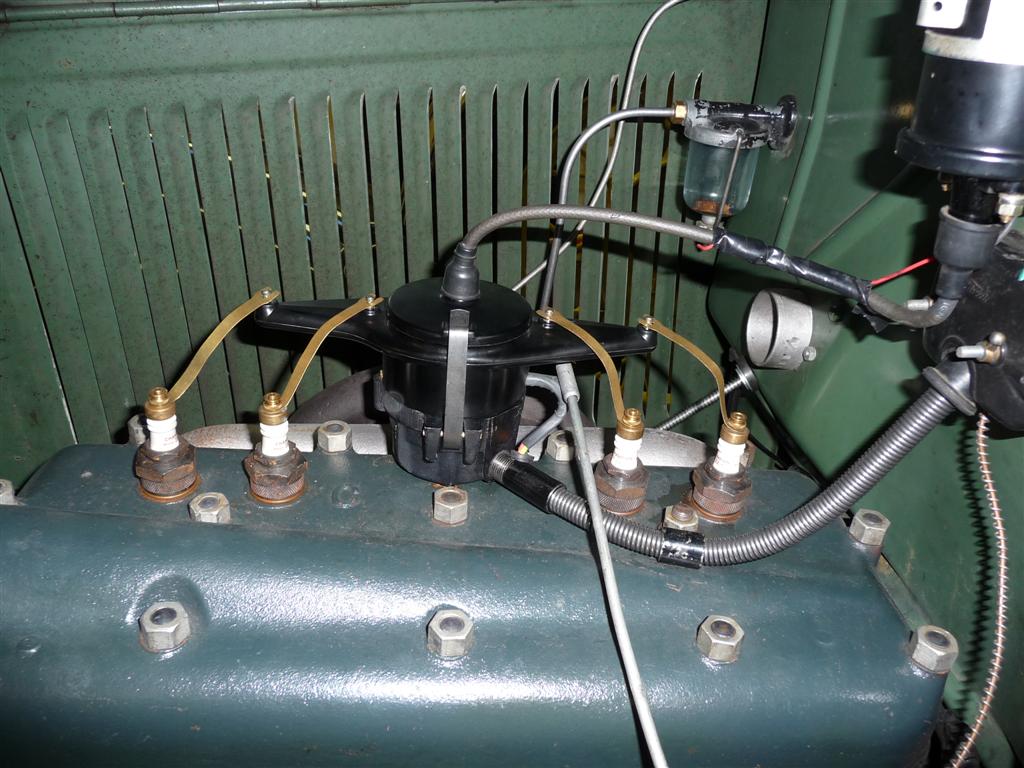
The distributor was from First Street Ignitions of Ponca City Oklahoma (call 508 762-8322 or see www.fsignitions.com). It's called the Zipper and it includes everything that you need to make the change, other than an ignition switch.
The stock Model-A ignition switch, called a pop-out, is so named since when you turn the key to the run position, it pops out. You can then remove the key if you wish, and simply push it back in to turn the motor off. Electrically, the stock switch routes the signal from the coil through the steel cable assembly (for theft protection) to the distributor. This isn't compatible with the FS ignition system, so the switch need to be changed out to one that can route battery power to the distributor, in addition to the spark signal coming from it.
I purchased a switch called the "Re-Pop Switch" from Snyder's Antique Auto Parts of Springfield Ohio (call 330 549-5313 or see www.snydersantiqueauto.com).
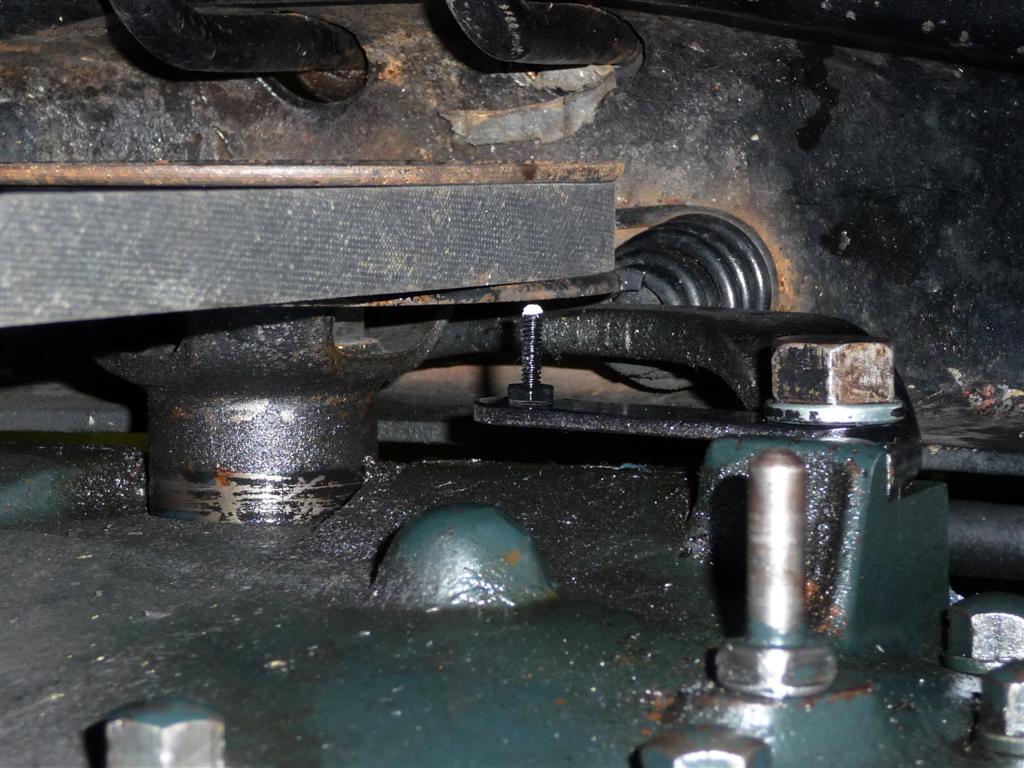
Distributor installation is straightforward with good instructions. However, the Model A doesn't have timing marks, and with the electronic ignition, you can't measure when it sparks except with use of a timing light. The engine has a peg that can be used to find top dead center (or in the case of the Model B engine, four degrees before top dead center). I made a pointer that bolted to the engine (1/8" x 3/4" steel strap,1/2" through-hole one end, #10-24 tapped-hole other end for a screw that serves as the pointer, 2" between holes) then painted a mark on the pulley at TDC, then from the diameter of the pulley, computed the distance 28 degrees would be, then made another mark there. With the 5 1/4" pulley, 28 degrees is 1.28" around the outside of the pulley from TDC. Now a timing light can be used to set the timing accurately while running.
Unlike a normal distributor, but just like the original Model-A, rather than spinning the distributor around to set timing, you loosen a screw in the top of the distributor shaft, and the rotor/points assembly can be twisted around to where you want it, then you tighten the screw to lock in the setting. Small changes can be made spinning the distributor, but there isn't a lot of rotation available because of the strips that serve as spark plug wires.
A couple weeks after installing the distributor, I noticed that the car was spitting out radiator water from time to time. I thought it must be a blown head gasket getting combustion air into the cooling system, so I pulled the head. Prior to pulling the head, I put the engine at TDC to help realign the distributor upon reassembly. While it turned out that the head gasket wasn't blown, while the head was off I noticed that the #1 piston wasn't all the way to the top of its stroke. I discovered that the TDC notch in the timing gear was really showing about 15 degrees before top dead center. As a result, I had the timing way too far advanced, and that was causing the water issue. A new lesson about automotive assumptions was learned. I also discovered that a normal compression gauge won't work with these great big spark plugs (they take a 1 1/8" wrench), but you can disassemble one of the sparkplugs, then tap the inside of the base to a standard 14mm spark plug thread, and use it as an adapter.
Model-A home...
![]()