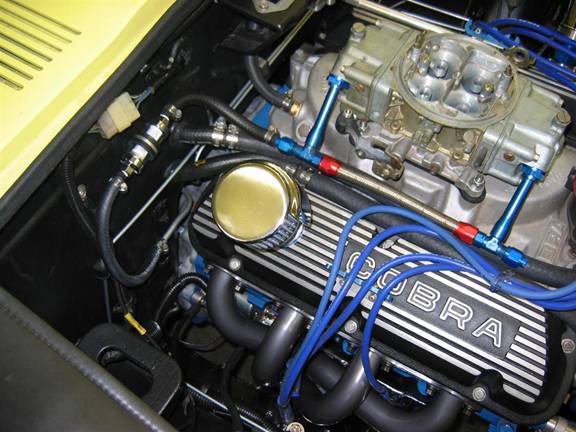
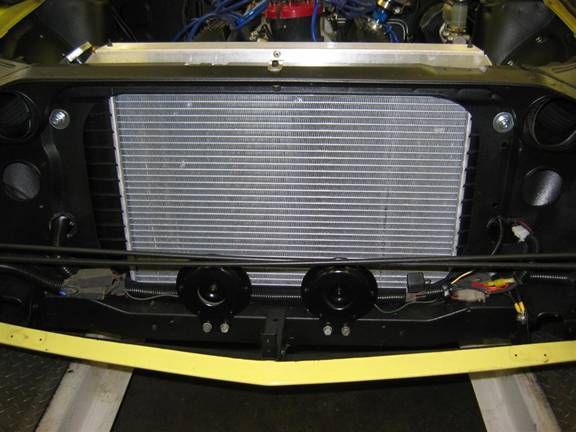
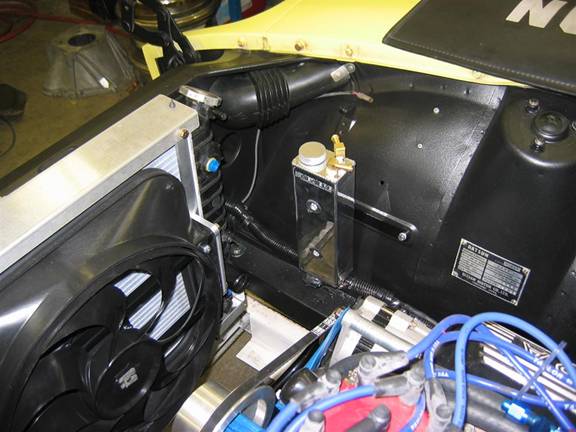
For cooling, I had purchased a couple of radiators that "almost" fit at the junk yard. But after reading about JTR's new radiator, I decided to buy that. It' a thick one-core aluminum radiator, and is reasonably priced at $140. In addition, they sell mounting brackets, which I purchased The radiator is nice, but as they warn, it's very sensitive to physical damage. The aluminum fins bend at the lightest touch. The brackets have good bends and plating, but I found that the top bracket allowed the radiator to flex back very easily at the top. So I made a little bracket that made it much stiffer, and uses an existing hole in the top brace. You can see it at the top center of this picture.
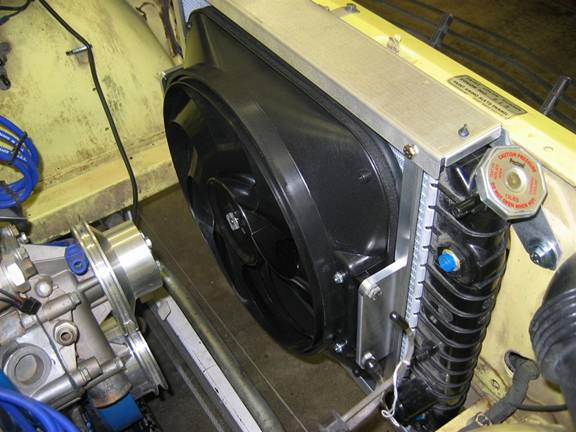
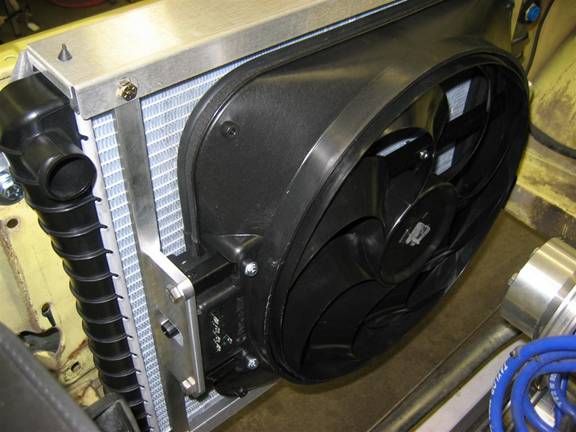
I also purchased a fan mounting kit from JTR, which consists of two upright aluminum bars. Inexplicably, the holes in the top and bottom brackets don't line up for these, so I had to change the location of one of the holes for everything to be straight. I don't know how this occurs on parts that otherwise appear to be nicely made by a sheet metal shop, my experience is that things from production shops are always very accurate. JTR also included some bolts and nuts with the mounting kit, but it was an eclectic set. The bottom bolts were too long, but included a pile of washers so the nuts didn't bottom out, and the bolts that threaded into the upright bars were grade-8, even though they only were threading into thin aluminum. But I'm not complaining, it's nice that they included hardware in the kit, and a quick trip to Lowe's provided bottom bolts of the correct length.
I bought a Flex-A-Lite Black Magic 160 fan from Summit. This is a VERY nice fan that has thick, soft gasketing where it meets the radiator, excellent hardware and wiring, and good instructions. It is quiet and moves a lot of air. The car thus far has never heated up on me at all. It does use a lot of current though, I think about 45A, so I'm glad that I have the extra large alternator.
The temperature probe with the fan is meant to push through the radiator fins, but they are too close on this radiator to allow that. So I wire-tied it to the rear of the radiator, on the upper driver's side, and that seems to work fine.
I machined some aluminum brackets to mount the fan to the radiator, rather than use the universal ones provided with the fan. I think these have a little nicer appearance than those provided with the fan. In this picture, you can also see the top center bracket that makes everything much more rigid:
For an overflow tank, nothing at the junkyard seemed quite right, so I purchased this nice unit from Summit and mounted it with an L bracket that uses the holes previously occupied by the voltage regulator.
To plumb up the hoses, my friendly CarQuest manager loaned me his book of hoses and I found upper and lower hoses that could be used with a single cut and coupling. I felt lucky this way since the bottom hose is 1 13/16" motor end, 1 9/16" radiator end, and the top hose is 1 ½" motor end, and 1 5/16" radiator end.
For heater hoses, I was astounded to find that the car and motor both used 5/8" hose! That must be a first in this conversion. The JTR book suggests that you don' want to have unsightly junctions of the heater hoses in the engine compartment, so recommend that you replace the entire hose. Believing that, I crawled under the dash, feet in luggage area, and took the old hoses out – anti freeze dripping in my face. Then I installed the new hose and found that it couldn't make the sharp bends under the dash without some kinking, so I put back the original hoses, cut them off in the engine compartment and installed unsightly couplings. It doesn't look that bad, and better then having impaired heater function.